Choosing the right stone can transform a garden path from a simple walkway into a lasting landscape feature. Yet appearance alone should not decide the material. Experienced landscapers examine drainage, local climate, soil movement, foot traffic, maintenance, and the garden’s existing character. A pale limestone may brighten a shaded border, while dark slate can make green foliage appear richer. Granite often handles heavy use, but its surface may feel severe in a relaxed cottage garden.
Thomas Rainer, a landscape designer and co-author of Planting in a Post-Wild World, offers a useful principle: “The best landscapes are not created by imposing our will on nature, but by collaborating with it.” That idea matters when learning how to choose stone for garden paths. A path should respond to the site, not fight it. Watch where rain collects after a storm. Notice whether tree roots lift nearby paving. Test a sample under wet conditions, because some stones become unexpectedly slippery. Small details matter.
There is no perfect stone.
Natural variation can be beautiful, but inconsistent thickness may complicate installation. Loose gravel feels informal and drains well, yet it can spread into planting beds. Large slabs look elegant, although they may require more careful leveling. Local stone often suits regional conditions and reduces transport impacts, but availability and quality can vary. This guide will compare practical options, surface textures, costs, safety concerns, and installation needs. It will also question common assumptions, because the most attractive choice is not always the most reliable one.
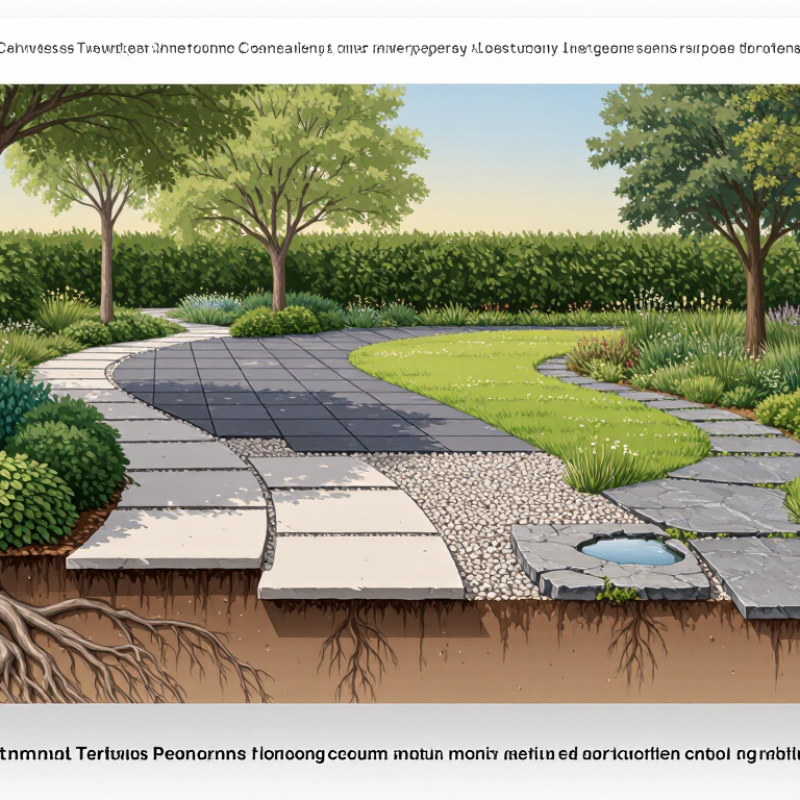
Before choosing stone, define the path’s expected load. A narrow footpath needs a different base than a route carrying wheelbarrows, carts, or maintenance equipment. The USGS Mineral Commodity Summaries 2024 estimated U.S. crushed stone production at about 1.5 billion metric tons in 2023. That scale reflects its importance as a compactable base material, not merely a cheap filler. For walking paths, angular crushed stone usually locks together better than rounded gravel. I have seen attractive paths fail because the base was too thin. Appearance cannot repair poor load planning.
Drainage deserves equal attention. NOAA Atlas 14 precipitation-frequency data show that 24-hour, 100-year rainfall can range from under 2 inches in parts of the Southwest to over 20 inches in wetter regions. Check the rainfall data for your exact location. Shape the path with a slight cross slope, and place compacted base beneath the finish stone. In clay soil, a geotextile layer may reduce pumping and migration. It is not magic.
Climate changes the selection again. Freeze-thaw areas need dense, low-absorption stone, while hot regions require surfaces that tolerate intense sunlight and thermal movement. The Natural Stone Institute recommends evaluating absorption, strength, and freeze-thaw performance through documented testing. Ask for test results, not vague promises. A locally available stone may suit the climate better, but local does not automatically mean durable. Test a small section after heavy rain and one winter cycle.
How to Choose the Best Stone for Garden Paths?
When choosing stone for a garden path, look beyond color and texture. ASTM C97/C97M provides comparable measurements for water absorption and bulk density. Test reports usually show dry mass, saturated mass, and calculated absorption. Lower absorption generally means less water enters the stone. That matters where rain, frost, and repeated wetting occur. Density adds another clue. A denser stone may feel stronger, but density alone cannot predict every outdoor failure. Data needs context.
Ask for results from several specimens, not one attractive sample. Natural stone can vary across a single quarry block. Compare absorption percentages under the same test method. Then review density in kilograms per cubic metre and check laboratory conditions. A path beside sprinklers may need tighter absorption control than a dry, sheltered walkway. Small differences can matter when water freezes inside pores. They can also affect staining and cleaning.
Use the test data with practical inspection. Wet a spare piece and watch for darkening, soft edges, or uneven color. ASTM results do not measure slipperiness, surface finish, or installation quality. A field check helps. I would avoid choosing the lowest absorption value automatically. A rough surface, proper drainage, and sound bedding still matter. Ask whether the tested material matches the delivered stone. That question is easy to miss.
Lower water absorption generally indicates better resistance to moisture, freeze–thaw cycles, staining, and weathering. Higher density usually indicates a more compact stone with greater resistance to wear and foot traffic. Based on representative published natural-stone test ranges, granite, basalt, and quartzite offer a strong balance for garden paths, while sandstone typically requires more careful drainage and sealing.
Values shown are representative midpoints of commonly reported natural-stone ranges. Actual ASTM C97/C97M results vary by quarry, sample, and production batch; project-specific laboratory test data should be used for final selection.
Choosing stone for a garden path requires more than checking colour and surface texture. In cold climates, water enters pores, freezes, expands, and creates hidden cracks. EN 12371 measures this risk through controlled freeze–thaw testing. Test pieces are saturated, frozen, thawed, and inspected after repeated cycles. Many European specifications use 56 cycles for exterior applications, although the required schedule depends on the project.
Look beyond visual appearance. Compare flexural strength before and after testing, mass loss, cracking, scaling, and surface changes. A 2023 report from the European Commission identified moisture exposure and repeated weathering as major durability concerns for construction products. The Natural Stone Institute also advises evaluating absorption, porosity, and intended climate together. Low water absorption usually helps, but it is not a guarantee.
Ask for the complete EN 12371 laboratory report. Check the stone’s quarry location, test direction, specimen thickness, and conditioning method. Those details matter. A path beside sprinklers may face harsher exposure than a covered terrace. Light-coloured stone can hide early frost damage, while textured surfaces may trap more water. I would not rely on one impressive strength figure. Test results can vary between blocks, and real gardens are less controlled than laboratories. Some decisions still require local experience.
Choose stone with more than appearance in mind. Rain, algae, and muddy footwear can quickly change a garden path’s safety. Look for textures achieving at least 36 PTV in wet BS 7976 testing. This figure offers a useful reference for pedestrian paving. However, it does not guarantee perfect grip in every situation. Results depend on the finish, testing direction, moisture, and equipment. Request the full test report, rather than relying on a rounded claim.
Wet the sample and run your hand across its surface. A lightly textured finish may feel secure, while deep grooves can trap soil and become difficult to clean. I would also test the sample on a gentle slope. Pour water across it and watch the flow. Check the edges, joints, and drainage. Standing water can weaken the benefit of a strong laboratory result. Keep the texture consistent near steps and turning areas, where feet often twist. Poorly filled joints can also create trip points.
Choose a finish that remains practical after regular brushing. Smooth polished stone is usually unsuitable outdoors. Very rough textures may challenge wheels, garden chairs, or bare feet. That trade-off needs honest consideration. Recheck the paving after installation, especially beneath trees and near sprinklers. Dirt changes performance. Maintenance is part of slip resistance, not an optional extra.
How to Choose the Best Stone for Garden Paths?
Match stone thickness, base depth, and joint width to pedestrian loads. A garden path usually carries people, carts, and occasional maintenance equipment. Natural stone slabs around 50 millimeters thick offer a practical starting point for pedestrian areas, but weaker stones may need more thickness. The Natural Stone Institute’s technical guidance stresses testing absorption and strength, using ASTM C97 and ASTM C170 methods. A dense, low-absorption stone generally handles frost and wet conditions better.
Base depth matters more than many homeowners expect. Industry guidance from the Interlocking Concrete Pavement Institute commonly uses 100 to 150 millimeters of compacted aggregate for pedestrian paving, depending on soil and drainage. Clay soil may require deeper excavation, while well-drained gravel soil may need less. Compact each layer carefully. A beautiful slab can still rock over a soft base.
Joint width should suit the stone edges and installation method. For sawn edges, 3 to 6 millimeters can create a clean appearance. Irregular, hand-cut edges often need 10 to 20 millimeters for stable alignment and joint filling. Narrow joints can trap water when edges are uneven. Wide joints may encourage weeds, though polymeric or mortar-based fillers are not suitable for every stone. I would inspect a test section after rain. My first layout is rarely perfect. Small adjustments often prevent larger repairs.
A narrow footpath needs a different base than a route for wheelbarrows. Plan for carts and maintenance equipment too. A thin base can fail. Pretty stone cannot fix poor load planning.
Angular crushed stone usually locks together better than rounded gravel. Its edges create a more stable base after compaction. Rounded pieces may shift under repeated footsteps. I would still test a small area.
Shape the path with a slight cross slope. Place compacted base material beneath the finish stone. Check local rainfall records before installation. Clay soil may need a geotextile layer. It is not magic.
Water can enter stone pores and cause staining or damage. Paths near sprinklers need tighter absorption control. Compare absorption percentages from several stone specimens. One attractive sample is not enough.
Lower absorption usually means less water enters the stone. That helps where rain and freezing occur. Density offers another useful clue. It does not predict every outdoor failure.
Ask for complete laboratory reports from multiple specimens. Review dry mass, saturated mass, absorption, and bulk density. Check whether the tested material matches the delivered stone. This detail is easy to miss.
Look for repeated freezing and thawing test results. Review strength before and after testing. Check cracking, scaling, mass loss, and surface changes. A strong single figure may mislead. Real gardens are messier.
Cold regions generally need dense, low-absorption stone. Hot regions need surfaces that tolerate sunlight and thermal movement. Local stone may suit the climate better. Local does not automatically mean durable. Test it after heavy rain.
Learning how to choose stone for garden paths begins with understanding the path’s expected loads, drainage conditions, and local climate. Pedestrian paths may need less structural support than areas carrying carts or garden equipment, while wet or poorly drained ground requires careful planning. Compare candidate stones using water absorption and density data from ASTM C97/C97M testing, since lower absorption and suitable density can indicate better performance in damp conditions.
Freeze–thaw resistance should also be evaluated through EN 12371 durability testing, especially in climates with repeated temperature changes. For safety, select a surface texture that achieves at least 36 PTV in wet BS 7976 testing. Finally, coordinate the stone’s thickness with the compacted base depth and joint width. A stable, well-drained foundation and properly sized joints help distribute pedestrian loads, reduce movement, and support long-term path performance.

Tranquix Stone